The skin-on-frame kayaks from Ashes are based on their strip-built cousins. They share the elegant sheer and deck lines above the water line, and the functional rocker and chines below the water line.
To maintain the functional rocker, and elegant sheer and deck lines our skin-on-frame boats are designed around a unique central core (floorboards, cockpit rim, and central frames) which is essential to the structural integrity of the boat.

The assembly sequence outlined below will provide guidance to builders as they embark on their kayak-building project. The drawings are for a 15 footer, but apply equally to the 17 and 13 foot boats. Keep in mind, also, that this sequences don’t include building techniques, for instance how to tie stringers to frame etc … where we feel that its necessary to use mechanical fasteners or extra lashings, we’ll let you know, but you’re free to use whichever techniques you feel suit your experience or skill levels.
(Note … plans for the SOF boats have been released on a proprietary basis. They are currently in testing and are only distributed via special request. These directions are intended for those involved in the pre-release program. If you’d like to be informed when the plans are released please subscribe to Ashes newsletter, or our Facebook or Instagram feeds.)
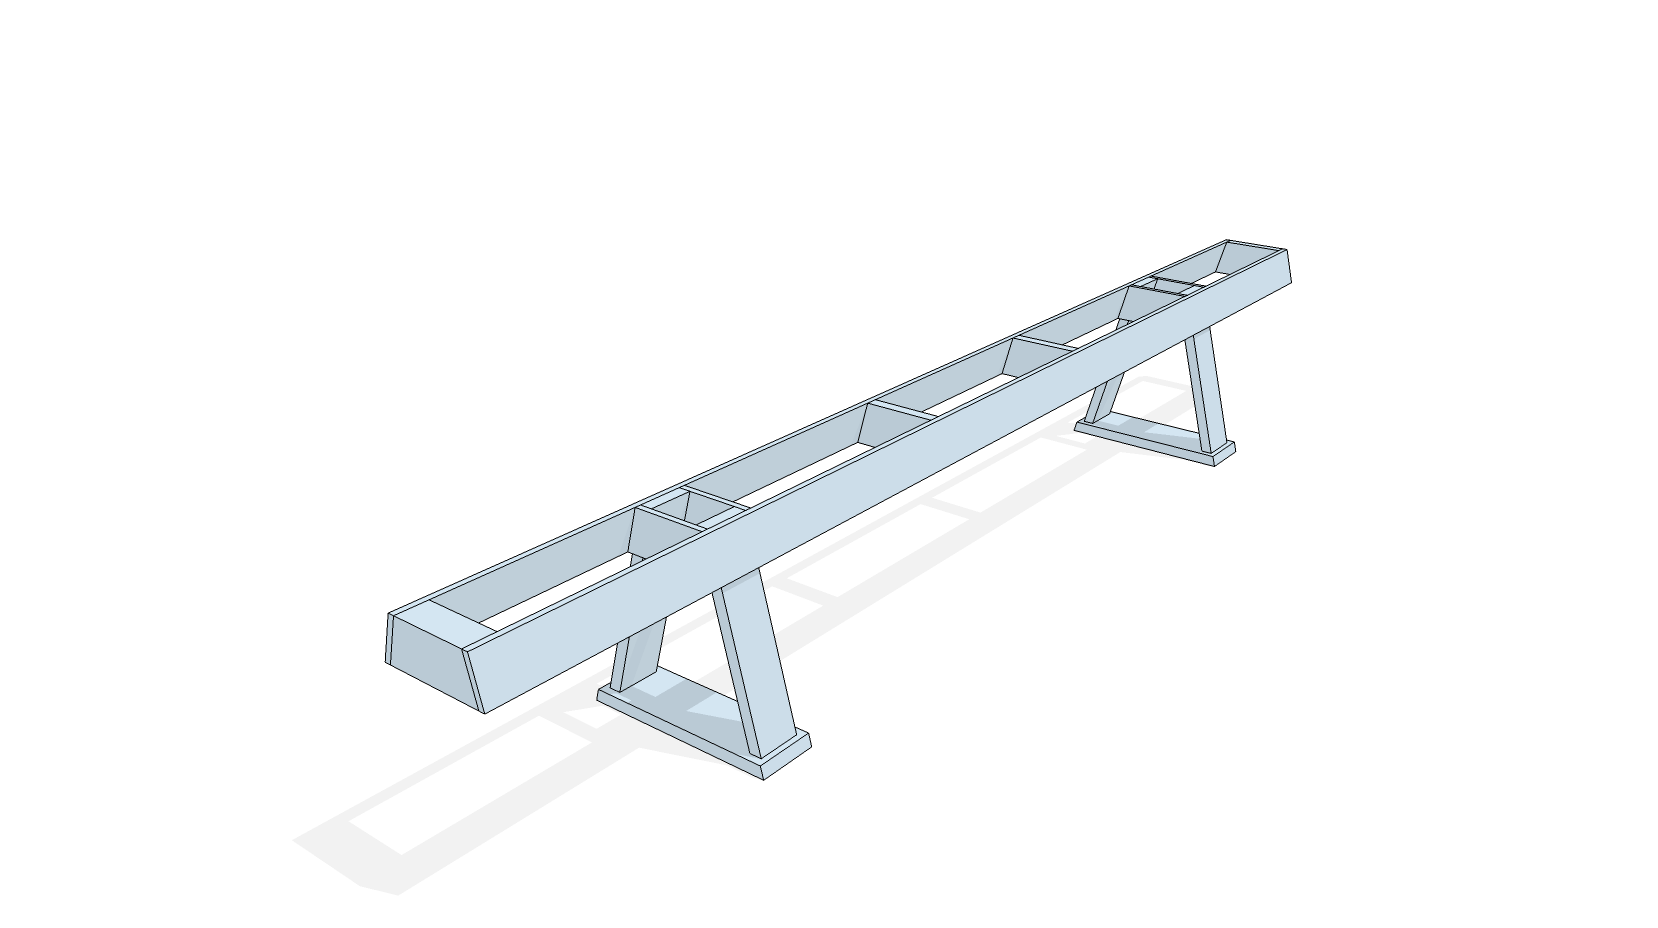
1/ The Strongback
There are as many designs for strongbacks as there are authors of kayak building blogs and books. What’s common to all of those that are worth their weight, are that they provide a solid and square platform which will ensure that your future boat comes out in the shape your designer intended. If you have a twist in your strongback, your boat will have a twist. If your strongback isn’t level, you run the risk of your boat not sitting trim on the water. Now is the time to check and double check.
As for the design shown here, I believe its a good compromise of materials, stability and stiffness. The modified box shape will help ensure that things stay square if you ever to move your strongback in the future.

And as the need for a strongback at all? Well, some designers and builders of skin-frame-boats design their boats to be shaped during the build process according to the needs of the user … an Ashes All Water isn’t on of those boat. We’ve spent a great deal of time ensuring that her rocker, chines, beam and length all work together to ensure a safe, stable, and efficient design that will provide paddlers a premium experience.
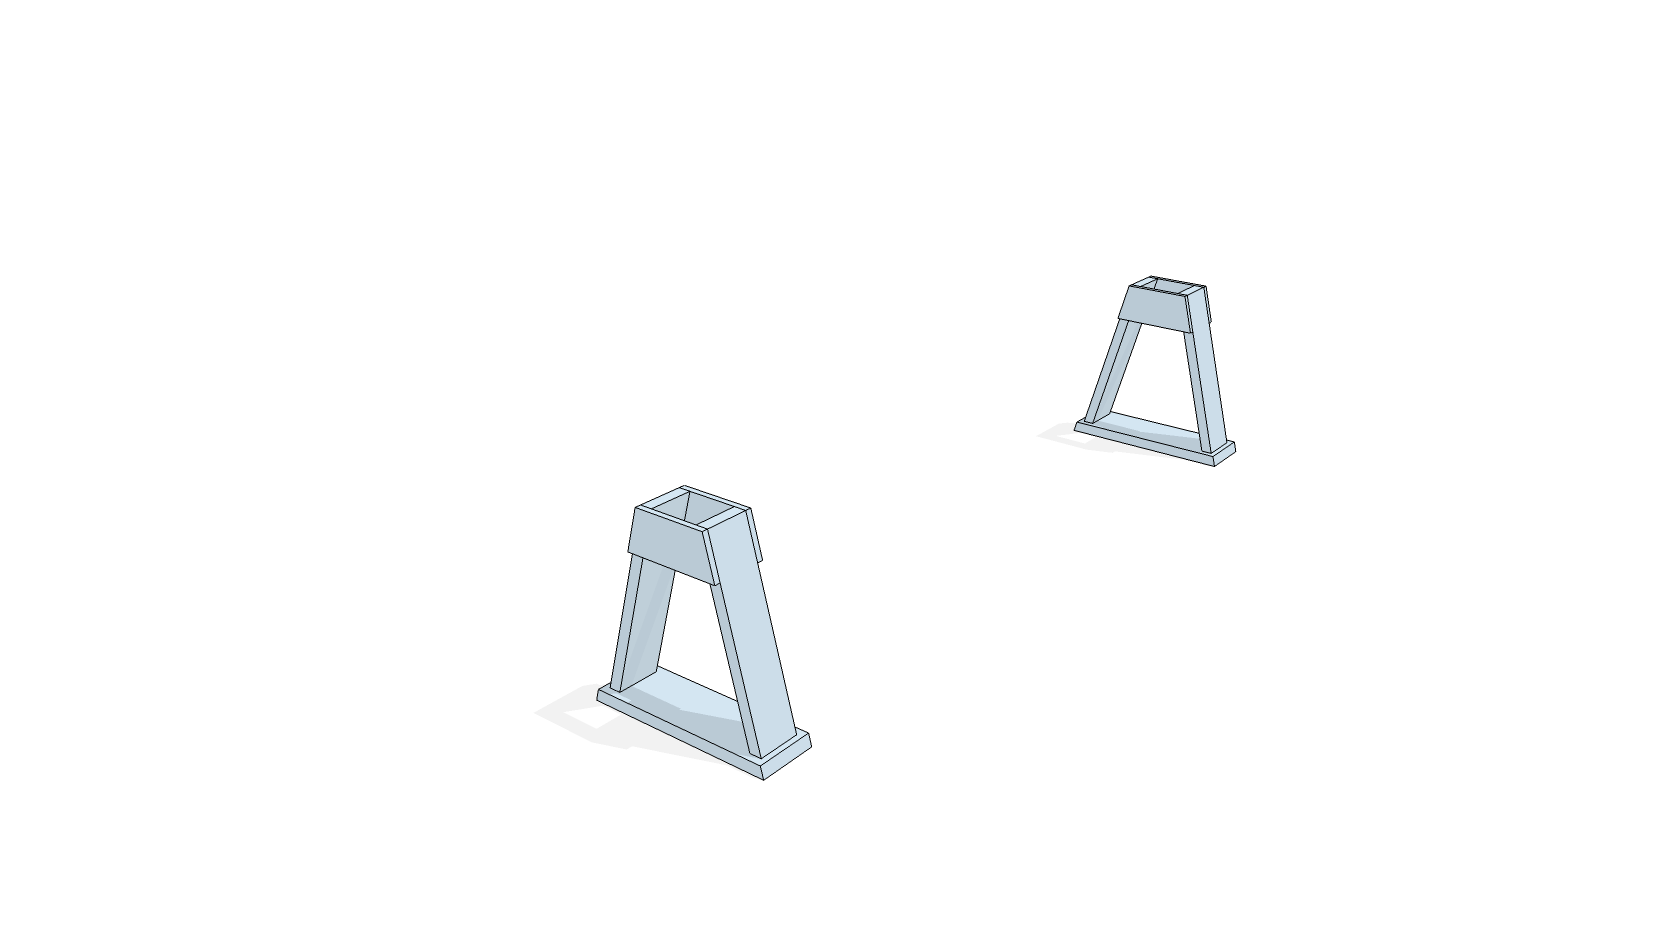
2/ The Frame Pedestals
The station pedestals are unique to Ashes building method and ensure that your kayak will take the finished shape intended by the designer.
Full size drawings for pedestal stations are included with plans from Ashes. Your plans will also provide the spacing for each station, which should be transferred to the strongback top. Ensuring accuracy now will make the build easier down the road. Focus on an accurate distance between pedestals and that each pedestal is properly aligned along the center line.

3/ The Keel
Laying the keel now will lock in the rocker shape and provide a landing place for the frames in the next steps. You needn’t trim it length yet; just ensure it extends past the two end pedestals enough that you can trim to length when you are ready to install the stems (for now, 8″ either side will be fine).
In our shop, we initially use straps to tie the keel down to the strongback which ensures that it keeps it shape. You can use whatever technique you wish, just make sure that you’ll be able to release the keel from the pedestals when you’ve finished the boat!

4/ The Center Frames
The five center frames make up the core of the boat. They are designed to be landing places for the floorboards, cockpit rim, and eventually the deck stringers.
 You’ll want to make sure that the frames are perfectly aligned in both lateral and vertical orientation. True 90 degree angles now will ensure that everything fits later!
5/ Floorboards
The floorboards provide a solid platform for the paddler, the seat, and protect the skin against point loads and abrasion from inside the boat.
 It’s entirely up to the builder, but I would recommend attaching the floorboards to the frames with (stainless) screws. This will make easier to remove and reattach or replace in the future. That said, lashing them is just fine and may just scratch your aesthetic itches so if that’s the case, have at it.
6/ The Kingplanks
The kingplanks mark the center line of the fore and aft decks.
They should be cut long enough to extend into the cockpit area an 1.5 inches (4 cm). Don’t tie them to the frames at their cockpit ends either. They will need to be properly shaped before installing the coaming base. That said, ensure that the other lashings are tight as the kingplanks do much of the work in keeping the intended rocker in place.
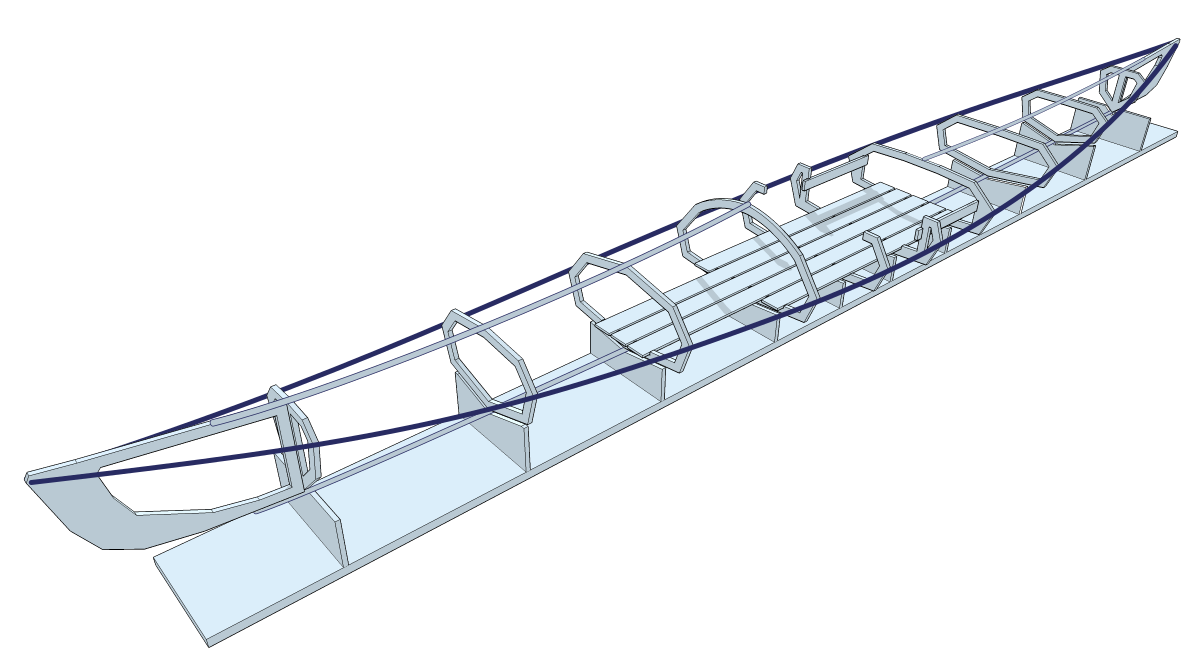
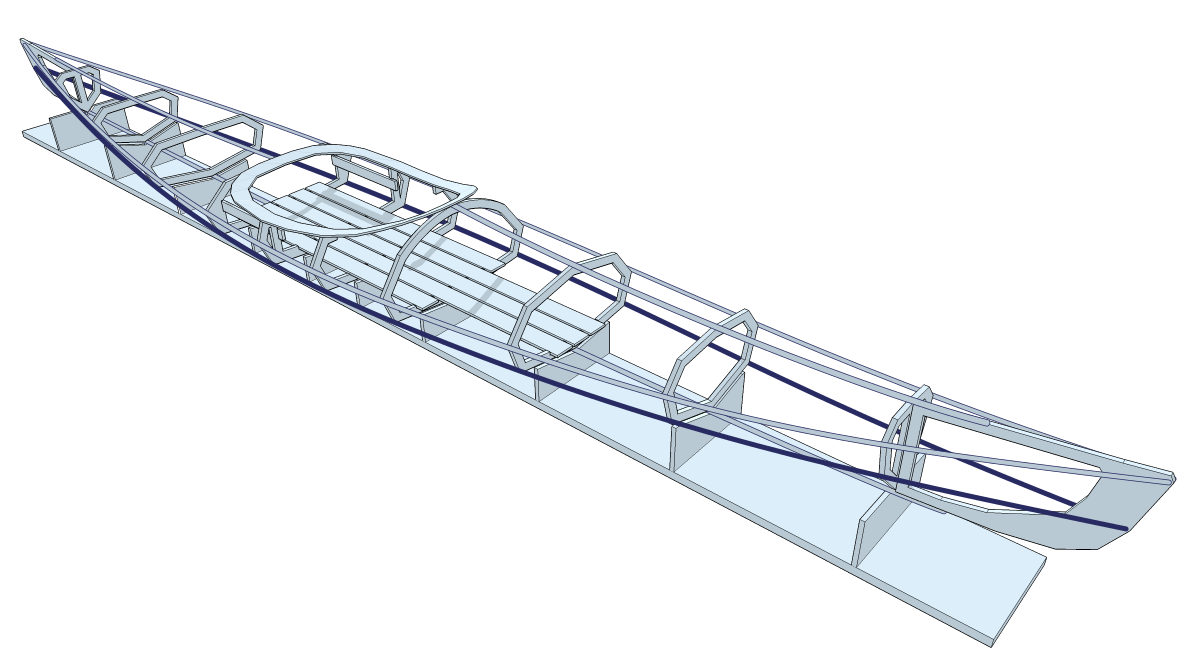
7/ Installing the Sheer and Chine Stringers
These two sets run the full length of the boat; the sheer stringer being the upper of the two; the chine stringer the lower of the two. They will do their work best if also mechanically attached (screws or pegs) to the fore and aft stems.
Keep in mind that these stringers will take a lot of abuse, so save your best wood for here. Ensure that the wood you choose has an even grain with no run-out and no knots.
 The Sheer Stringers
 The Chine Stringers
8/ The Coaming Base
Now is the time to install the base on which the coaming riser and rim will sit.
This is where an Ashes boat is most unique. Unlike many skin-on-frame kayaks, the cockpit does not “float” on the skin, but rather is firmly affixed to the frames. This method allows the coaming to be act as an essential structural element.
Keep in mind that before you fit the coaming base you’ll want to shape the angle of the kingplanks and the frames on which the front and rear of the coaming base lands thus ensuring a good solid connection.
The base will take a lot of stress in its life as the skin will attach to it. As such, ensure that it’s solidly lashed into place at all contact points.

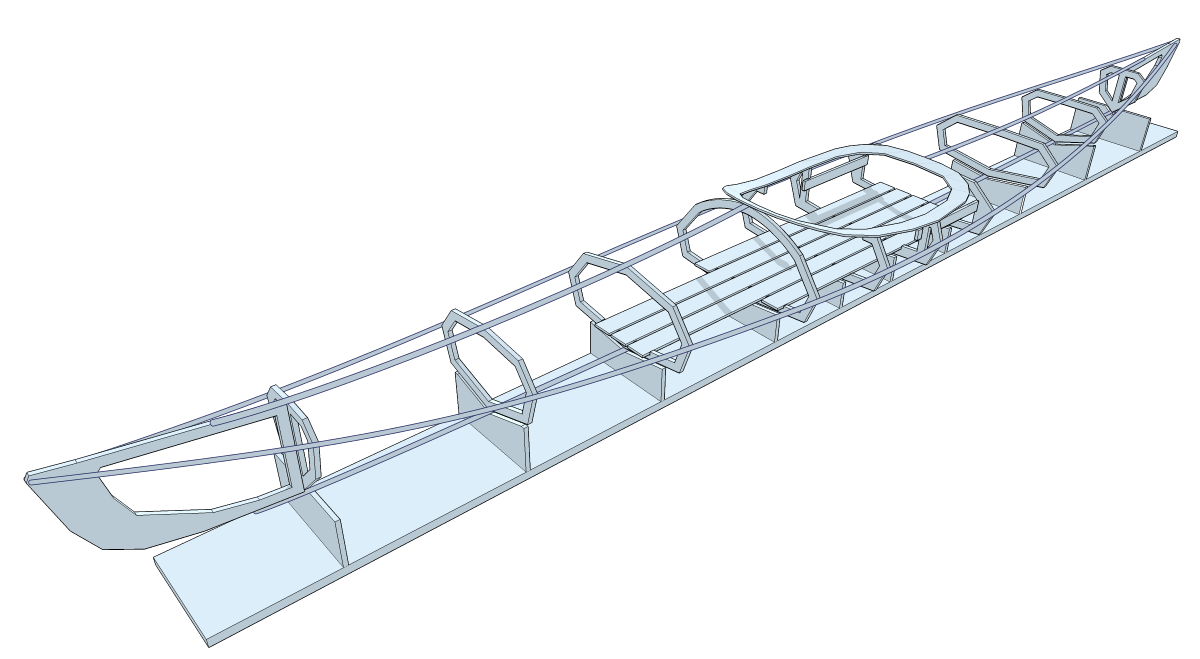
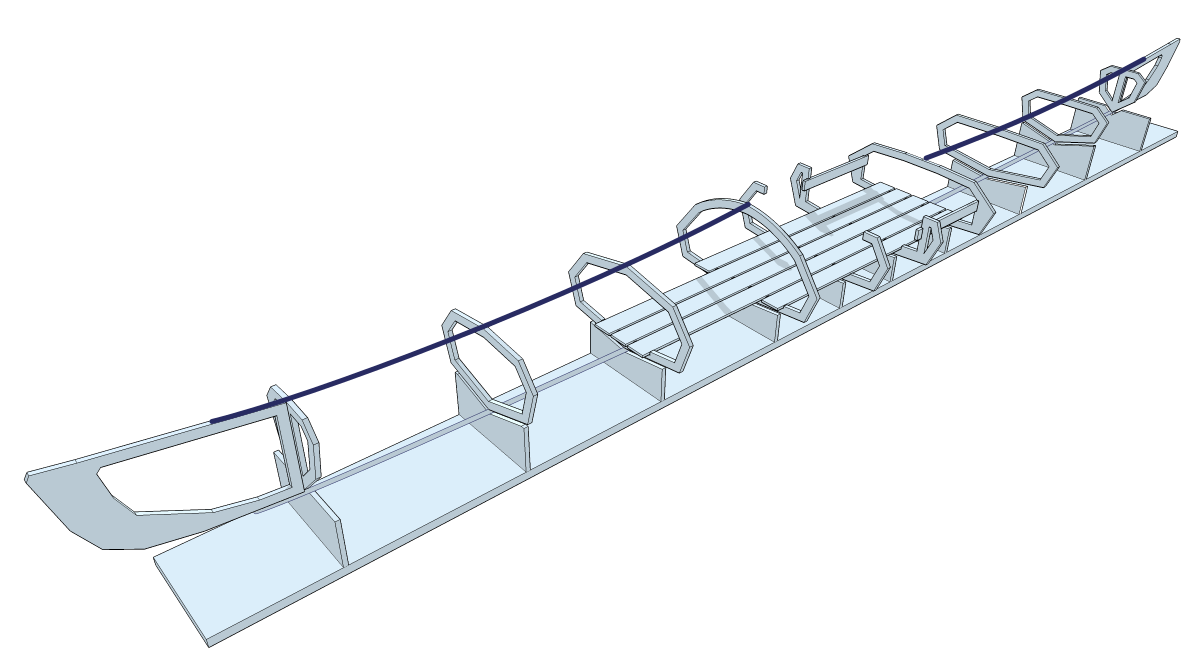
9/ Deck Stringers – Fore & Aft
The deck stringers are the least intuitive part of the build and will provide some pause for thought. They do NOT run the entire way from fore to aft, but rather tie in to the coaming base as separate pieces.
Once you knowthat there a four separate pieces (port and starboard aft, and port and starboard fore), and that they tie into the coaming base the whole structure will start to make a whole lot more sense.
The red circles in the drawing below indicate the landing points.


Given that these stringers land at an angle on both the coaming base, and the stems, you will need to a little bit of shaping and fitting prior to attachment. Take your time and all will be good. Remember, you’re a rock-star …
And That’s That
You’re done!
Well, sort of …
Install the coaming risers and rim. Once you’ve made sure all your lashings are tight and your mechanical fastenings haven’t split the stringers you can remove her from the pedestals (keep them handy though, because they make a great cradle for when you start sewing the skin).
You’ll want to coat the frame with a penetrating oil or varnish, and after that, have a good stiff drink … the skinning is no walk in the park.